One of the greatest problems that comes with owning more than one computer is figuring out how to sync files and folders between computers. You can of course do manual transitions with a USB drive. This is a real pain however and simply forgetting once can be frustrating.
Imagine heading down to your local coffee shop to edit some photos only to find, when you arrive, that you forgot them on your USB drive! Such a scenario has happened to me a few times, and it is more than a little annoying.
There is however a solution – Windows Sync. This program makes it possible to sync files and folders between computers through an Internet connection. Microsoft Sync literally syncs all files in a folder, no matter what kind of files they are. And get this – Microsoft Sync works for both the PC and Mac.
Installation & Settings
To begin you’ll need to download the Microsoft Sync tool on the two (or more) computers you wish to sync up. Microsoft Sync is part of Microsoft’s Windows Live platform, so you will need to have a Live login in order to use the program. If you don’t have a login yet, you will have to register.Once you have downloaded and installed the Windows Sync program you will notice that a new icon has appeared in your task tray. The icon looks like two blue arrows pointing in opposite directions. This indicates that Sync is running. The interface which you will use with Sync in order to share files and folders is actually web based, but before we go to the Sync website we need to change a setting that will make it possible to sync files and folders. Go to More –> Settings.
Your login information should already be inputted from the installation process, but if you don’t see it, or it looks wrong, go ahead and change it now. Also, click the checkbox next to “Allow remote access to my computer.” This setting must be turned on in order to properly sync files and folders.
Let’s Sync It Up
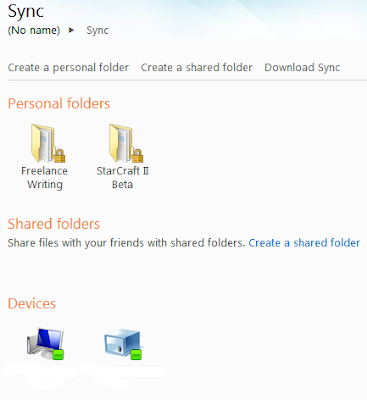
Now that the proper settings are enabled, we can go ahead and sync up our files and folders. This is performed using the web interface, so go ahead and launch the Windows Sync website. You can do this by clicking on the Windows Sync icon and then clicking Website on the drop-down menu.When you open the web interface you’ll have two options. One is to create a Personal Folder and the other is to create a Shared Folder. The Shared Folder option lets you create folders that can be shared with other Windows Live users. It is a handy way to share information, but it is also outside the scope of this tutorial. We’re just going to be focusing on the Personal Folders, so go ahead and click Create a Personal Folder.
The next screen will ask you which computer you’d like to create the folder on. This doesn’t really matter. You are going to be creating sync folders on both your computers during this process and all files in all of the folders on all computers will be transferred. I suggest simply selecting the computer you’re currently using.
The next screen will display an Explorer view of the computer you selected. You need to select the folder in which the contents you want to sync are contained or will be contained. For example, you might make a folder in My Documents and call it My Sync Folder. When you have accessed the folder you want, click Sync Folder Here.
Note that you need to be in the folder you want to sync. If you wanted to sync My Sync Folder you would have to click the Sync Folder Here option after you have opened My Sync Folder. If you click the option while you are in your My Documents folder your entire My Documents will be synced.
Syncing With Other Computers
You will now see a menu which is labeled “Sync with Another Computer.” The computer on which you already selected a folder to sync will be grayed out. From the list of other machines select the machine you want to sync with.This will bring up another Explorer view, and again you will need to select a folder. Obviously, it would be best if both the folders on both computers have the same name. However, this doesn’t have to be the case. If you want to sync two folders with entirely different names, you can.
The next screen will ask if you want to use Automatic Sync or On-Demand Sync. Automatic Sync will always sync files, while On-Demand Sync will only sync files when you request them. I suggest choosing Automatic Sync, as it eliminates an extra step. Then click Finish.
Your folders will now begin to sync. You can see this activity by clicking on the Windows Sync icon and then clicking Activity from the drop-down menu. This will open a window which shows the files which are currently being transferred and their status. You will also now the sync folder you created in the drop-down menu. You can access the local version of the folder by clicking on it in the drop-down menu.


